Thursday, October 14, 2010

scaling an object_discrete scale

PROBLEM:
When trying to scale an object (like the sphere in the example below) when i grab the scale tool it jumps by 1s instead of scaling in the decimals.

NOTE: I can still scale in the decimales in my attribute editor.


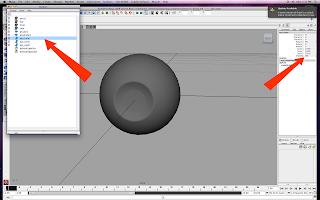
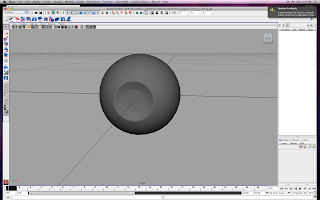
Here is the sphere I am trying to scale. (img above)


When I try to scale in the Y the sphere jumps instantly from 0.7 to 1.7 instead of increasing with my mouse movement.


When I try to scale in the Z the sphere till jumps from 0.7 to 1.7. (img above)


When I try to scale all part in the X Y and Z it jumps from 0.7 to 1.7 in all of the attributes. (img above)

I think the problem is in the preferences but I don't know what preferences to readjust.

SOLUTION: I had unknowingly had discrete scale turned on. When discrete scale is turned on you can hold 'j' while scaling and scale normal.

Click on this DISCRETE SCALE LINK from the Digital Tutors Forum to read a great explanation on discrete scale

Wednesday, October 13, 2010

Attribue Editor_Curve Type


The problem i can across is in my attribute editor. After i created a bridge across the face of the Raptor I wanted to change my CURVE TYPE from Linear to Blend. The problem is when i select the Curve Type to change it to blend I can not select blend. I am only allowed to type in numbers and letters as if it was the bridge's Divisions or Taper. Is there a button i have to hold inorder to change the Curve Type?

SOLUTION: Reset your computer. Sometimes your computer will be overwhelmed with all the work it has been doing and needs a reset. The attribute editor will work correctly after your computer reboots.

Monday, August 23, 2010

Hide Object

I came across my latest problem was while creating an eye for a character. I created the outer eye and inner eye objects. I pressed Ctrl+H to hide the outer eye so I could work on modeling the inside. After finishing the inner eye I wanted to add textures to the outer eye and make in transparent. The problem I came across was that I did not know how to make the outer eye visible again.

Below is the inner eye after I pressed Ctrl+H.


SOLUTION (multiple):

1. You can simply type Ctrl+Shift+H to see LAST hidden (sometimes can not be used depending on the situation)

2. You can open your outliner and select the hidden object and press Shift+H to unhide it.

3. You can check the visibility in the attribute editor once you select your object in the outliner and type 1 in the visibility tab make it visible.

Check imgs below to see the solutions.

Below- The left arrow points to the outliner and the the hidden object that must be selected. The left arrow shows where the visibility is located in the attribute editor. The visibility tab reads "off" meaning not visible.


Below- The outer eye is now visible and I can now add a transparent texture to it. The arrow points to the visibility tab in the attribute editor. The visibility tab reads "on" which will happen after your type 1 and press enter.

Face Center

I was not able to select the "face center" of the faces (img below)


"face center" is the vertex like dot found in the middle of a face (see img below)


Instead my object had no "face center". How do you adjust the option to have a face center or not?

SOLUTION:
Go to settings/preferences/selection then find the face selection and choose center (see img below).

Mirror Geometry Problem

I am trying to mirror the geometry of an early model of a head. When I select the head and mirror the geometry the open spaces on the head seem to fill instead of staying open (see imgs below).

polygons>mesh>mirror geometry


THE SOLUTION:
Check your merge threshold and lower you merge threshold if your mirrored object seems to be filling holes it should not be (see imgs below).

Above: Merger threshold set to 0......
NOTE: with 0 when you zoom up close there is a small separation between the two halves. This is best seen at where the bottom of the neck meets in the img above.

.01 works best with this model (see img below). Look at the neck and see how it is reacting to a .01 threshold. play with the threshold to make it perfect for your own objects.


Below: Merge threshold set to .1

Tuesday, August 17, 2010

border edge tool> bridge tool


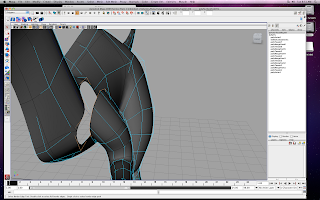
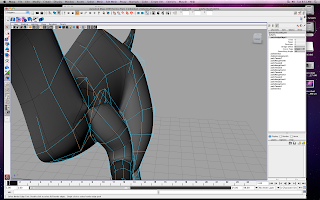
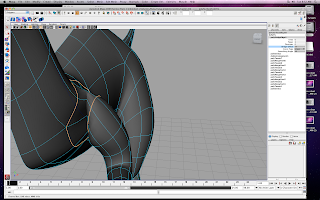
In the above imgs i am trying to merge the raptors arm to it's body.

before selecting the border edge tool and bridge tool i deleted history on both polygon objects and combined them to one object.

the problem i ran into to solve it is that the bridge tool is combining the two objects to a line not to the points the computer should automatically read.

select>border edge tool>bridge tool

SOLUTION:
The culprit for this type of behavior is flipped normals on one of your objects. Here's something you should check before merging your objects:

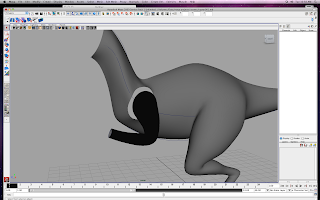
In your perspective view, go to the "Lighting" menu and disable "Two Sided Lighting". If any objects in your viewport turn black, they have flipped normals. In other words, the geometry is "inside-out". (img below)


This can be fixed by selecting the inverted geometry and going to Polygons > Normals > Reverse.

Wednesday, July 28, 2010

Fill hole tool

I was trying to use polygon tools> under mesh> the FILL HOLE option.

The problem I ran into was i could not fill the hole in the images below. I could only grab the purple cage not the edges on the polygon i wanted to fill hole on.


Solution:
I had my sub-d in "standard" mode. To fix select the object and go to surfaces>subdiv surfaces>polygon proxy mode and then try to work with the geometry.

Make sure you check if you are in standard mode or polygon proxy mode before filling a hole.