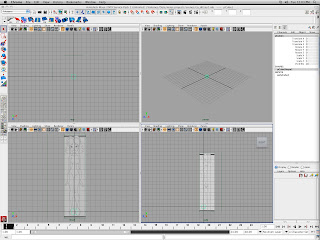
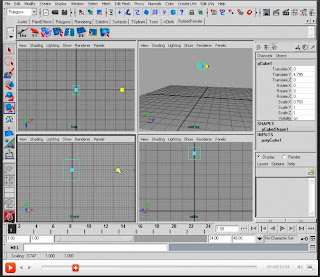
PROBLEM: I am attempting to select a vertex but when I select my vertex I actually select all my vertexes. Also a warn orange to yellow color appears over my objects details (SEE IMAGE BELOW) When I attempt to move a single vertex I move the entire object.
I must have hit a button by accident that has put me into this "unknown" mode.
SOLUTION:
I had pressed the hotkey 'B' which turned on Soft Select. By pressed 'B' again you exit this mode
problems i have with maya
Tuesday, April 12, 2011
Selecting Vertex selects all turns object WARM colors
Thursday, February 3, 2011
Move, Rotate, Scale Disappears/Move Image Plane
PROBLEM: When I click W,E, or R to get my Move, Rotate, and Scale in Maya I can not see the Move in the 'side' view. When I select Rotate I can only see a BLUE HORIZONTAL LINE in the 'side' view. When I select Rotate I can not see anything in the 'Side" view. (see images below)
I have reset maya hoping it was a maya error. I also restarted my computer. So it is not a maya error. How can I regain the ability to select my Move, Rotate, and Scale controls in the side view.
Rotate
Move
UPDATE: So my Move, Rotate, and Scale was hidden behind my IMAGE PLANE (see image below) So how do I reselect just the 'side view' Image plane and move it out of the way?
SOLUTION: Answer provided by Dan from Digital Tutors
The problem with moving my Image Plane (which was covering my Move, Rotate, Scale manipulator) was that i had my CAMERAS hidden in my 'persp' view.
NOTE:You can only select individual image planes in your 'persp' view.
I unhide my Cameras and then was able to select individual image planes in my 'persp' view. Once you select the image plan you want to adjust you go into your attribute editor and under INPUTS can readjust the location of your Image Plan (along with other attributes)
Dan was nice enough to make a Video for me so I attached it below.
Labels:
Disappear,
Image Plane,
MOve,
Rotate,
Scale
Tuesday, February 1, 2011
Selecting Image Planes
PROBLEM: Once you have imported your image plane and set it's attributes how do you reselect it to adjust the image plane's attributes?
SOLUTION:
You can adjust your image plane by going to EDIT>SELECT ALL BY TYPES>IMAGE PLANES you may now readjust it's attributes in the atribute editor.
SOLUTION:
You can adjust your image plane by going to EDIT>SELECT ALL BY TYPES>IMAGE PLANES you may now readjust it's attributes in the atribute editor.
Increasing or Decreasing Maya Grid Details
PROBLEM: I want to increase the grid when working in maya but I do not know how to edits the grids attributes.
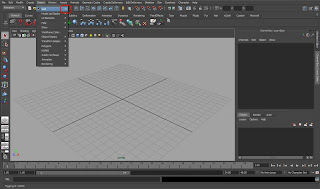
My grid looks like the image below.
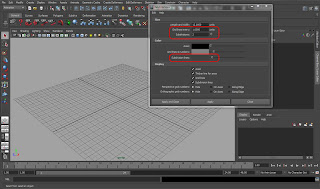
How do I increase the grid detail to look have the detail in the below image?
Solution: Provided by Dan from Digital-Tutors
To adjust the grid, you'll want to go to Display > Grid and open the option box.
There you can adjust a whole array of options. To get the look I am going for I'd want to play with the Grid Lines Every ___ units and then the Subdivisions option. You can also adjust the color of the subdivision lines to make them darker.
Labels:
Display,
Grid,
Grid Lines,
subdivision lines
Thursday, October 14, 2010
scaling an object_discrete scale
PROBLEM:
When trying to scale an object (like the sphere in the example below) when i grab the scale tool it jumps by 1s instead of scaling in the decimals.
NOTE: I can still scale in the decimales in my attribute editor.
Here is the sphere I am trying to scale. (img above)
When I try to scale in the Y the sphere jumps instantly from 0.7 to 1.7 instead of increasing with my mouse movement.
When I try to scale in the Z the sphere till jumps from 0.7 to 1.7. (img above)
When I try to scale all part in the X Y and Z it jumps from 0.7 to 1.7 in all of the attributes. (img above)
I think the problem is in the preferences but I don't know what preferences to readjust.
SOLUTION: I had unknowingly had discrete scale turned on. When discrete scale is turned on you can hold 'j' while scaling and scale normal.
Click on this DISCRETE SCALE LINK from the Digital Tutors Forum to read a great explanation on discrete scale
Wednesday, October 13, 2010
Attribue Editor_Curve Type
The problem i can across is in my attribute editor. After i created a bridge across the face of the Raptor I wanted to change my CURVE TYPE from Linear to Blend. The problem is when i select the Curve Type to change it to blend I can not select blend. I am only allowed to type in numbers and letters as if it was the bridge's Divisions or Taper. Is there a button i have to hold inorder to change the Curve Type?
SOLUTION: Reset your computer. Sometimes your computer will be overwhelmed with all the work it has been doing and needs a reset. The attribute editor will work correctly after your computer reboots.
Monday, August 23, 2010
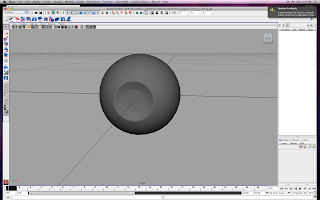
Hide Object
I came across my latest problem was while creating an eye for a character. I created the outer eye and inner eye objects. I pressed Ctrl+H to hide the outer eye so I could work on modeling the inside. After finishing the inner eye I wanted to add textures to the outer eye and make in transparent. The problem I came across was that I did not know how to make the outer eye visible again.
Below is the inner eye after I pressed Ctrl+H.
SOLUTION (multiple):
1. You can simply type Ctrl+Shift+H to see LAST hidden (sometimes can not be used depending on the situation)
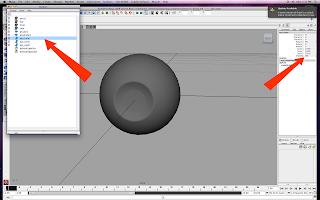
2. You can open your outliner and select the hidden object and press Shift+H to unhide it.
3. You can check the visibility in the attribute editor once you select your object in the outliner and type 1 in the visibility tab make it visible.
Check imgs below to see the solutions.
Below- The left arrow points to the outliner and the the hidden object that must be selected. The left arrow shows where the visibility is located in the attribute editor. The visibility tab reads "off" meaning not visible.
Below- The outer eye is now visible and I can now add a transparent texture to it. The arrow points to the visibility tab in the attribute editor. The visibility tab reads "on" which will happen after your type 1 and press enter.
Subscribe to:
Posts (Atom)